Beginnings of a simple site
Out of date Please see the updated version of this tutorial
Create a simple web page
Let's get started! The first thing we're going to do is create a simple web page
into which we can embed JBrowse Linear View. If you're using the VM, the easiest
way to get started is to open the terminal (second icon from the top on the left
side), and run code ~/html/. This opens the Visual Studio Code (VS Code)
editor in the ~/html/ directory. There is a server already set up that will
serve any files we put in this folder.
In VS Code, in the left sidebar you will see the HTML folder, which has a file
pre-populated called "index.ngingx-debian.html". Delete that file. Next, hover
over the HTML header and select New File and call the new file "index.html".
Then paste the following into the file and save it:
<html>
  <body>
    <h1>We're using JBrowse Linear View!</h1>
  </body>
</html>
Open this page in the web browser in the VM so that you can easily copy and paste code.
If you're not using the VM You can put the index.html file wherever you'd like, but it would probably be best to create a new directory somewhere to put it in.
Check that the server is working
Open a new tab in the Chrome browser and enter localhost into the address bar.
You should see a web page that says "We're using JBrowse Linear View!". If you,
congrats, you're on your way to adding JBrowse Linear View to a web site!
If you're not using the VM Go to the directory where you put your "index.html"
and start your server (e.g. run npx serve). Open your browser to the page
indicated by your server (e.g. for serve the default is
"http://localhost:5000").
Add JBrowse
To add JBrowse Linear View, you need to add the source to your page and then
create an instance. We'll start by adding a head to our page and use it to
load the source and a div that will hold JBrowse. Update your "index.html" so
matches what's below, then save it, switch over to your browser, and refresh the
page.
<html>
  <head>
    <script src="//s3.amazonaws.com/jbrowse.org/jb2_releases/jbrowse-linear-view/jbrowse-linear-view@v0.0.1-beta.0/umd/jbrowse-linear-view.js"></script>
  </head>

  <body>
    <h1>We're using JBrowse Linear View!</h1>
    <div id="jbrowse_linear_view"></div>
  </body>
</html>
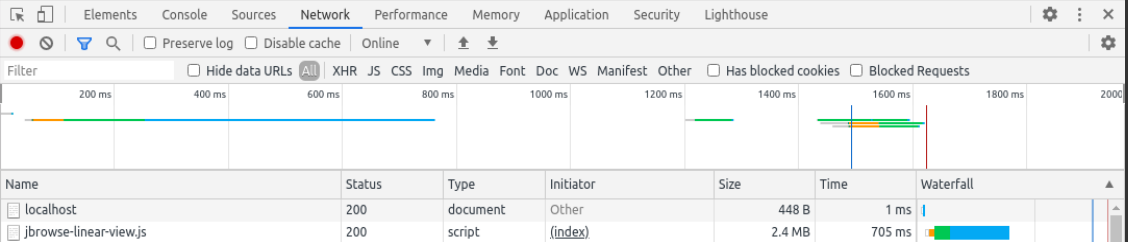
Now we can check if the script loaded properly. In Chrome, open the developer
tools (You can use F12 or Ctrl-Shift-I or right-click the page and select
Inspect) and go to the "Network" tab. If you see something like the below with
a status of 200 for "jbrowse-linear-view.js", then you are good to go!
Now we need to actually instantiate a view. The code to do so looks like this:
const genomeView = new JBrowseLinearView({
  container: document.getElementById('jbrowse_linear_view'),
  assembly: {
    /* assembly */
  },
  tracks: [
    /* tracks */
  ],
  configuration: {
    /* extra configuration */
  },
  plugins: [
    /* runtime plugin definitions */
  ],
  defaultSession: {
    /* default session */
  },
  location: '', // location
  onChange: () => {
    /* onChange */
  },
})
But first we need to know what to put in all these options. Let's explore that next.